1. Download the Extension Available for Chrome, Firefox, and more.
2. Create or Import a Wallet Generate a new wallet or import your existing one securely.
3. Start Managing Your Digital Assets Access your tokens, send/receive tokens, and interact with Xode dApps
Download the Xterium App
Seamless Blockchain Access
— Anytime, Anywhere
Manage your digital assets and interact with the Xode ecosystem through a secure, easy-to-use wallet designed for all your devices.
Whether you prefer browser or mobile, the Xterium Wallet has you covered.
How to Use
Create a new wallet
Agree to Terms of Service
Tick the checkbox to confirm that you agree to the Terms of Service of Xterium. Then, click the Create Wallet button to proceed.
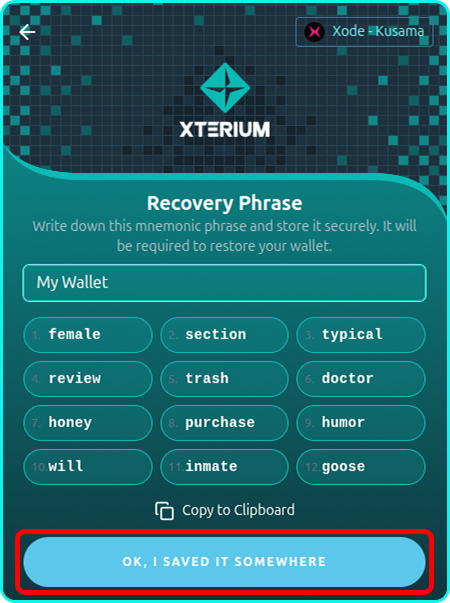
Name Your Wallet and Save Mnemonic
Enter a name for your wallet. A mnemonic phrase will be automatically generated—make sure to store it securely, as it is essential for recovering your wallet. Once saved, click “OK, I saved it somewhere” to continue.
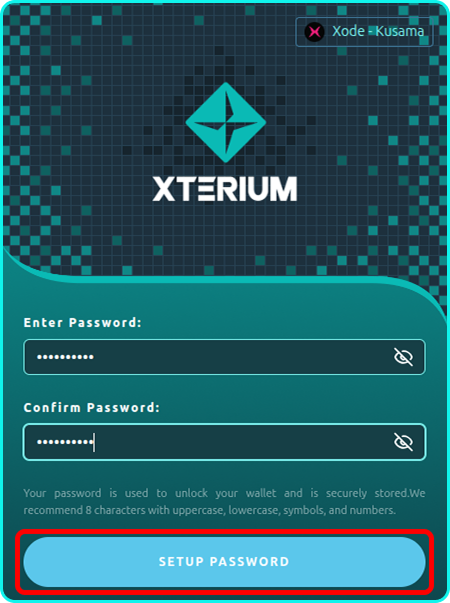
Set Up a Password
Create a strong password that will be required for logging into the extension, transferring tokens, and exporting your wallet. Click the Set Up Password button to proceed.
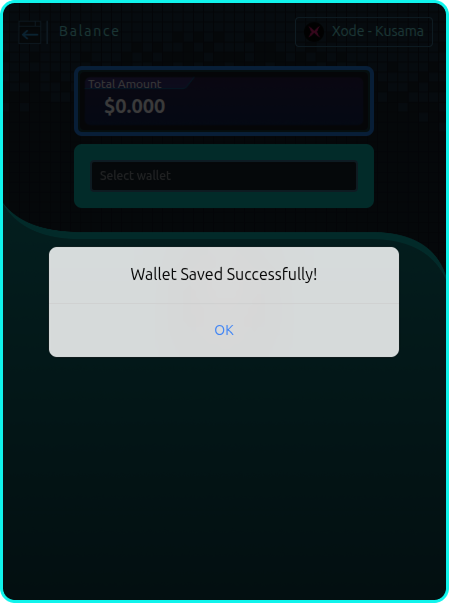
Wallet Initialization
Wait a moment while your wallet is securely saved and stored locally on your device.
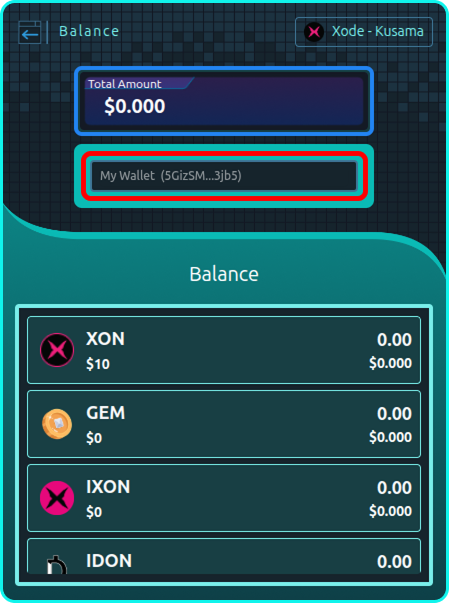
Access Your Wallet
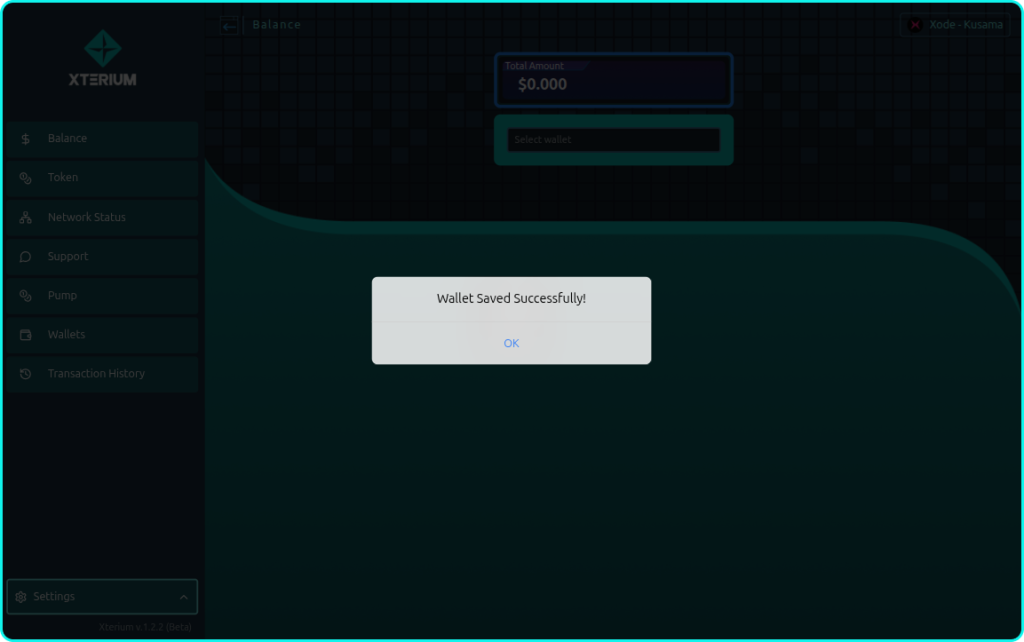
Once completed, you can view your newly created wallet in either the Balance page or the Wallet section of the extension.
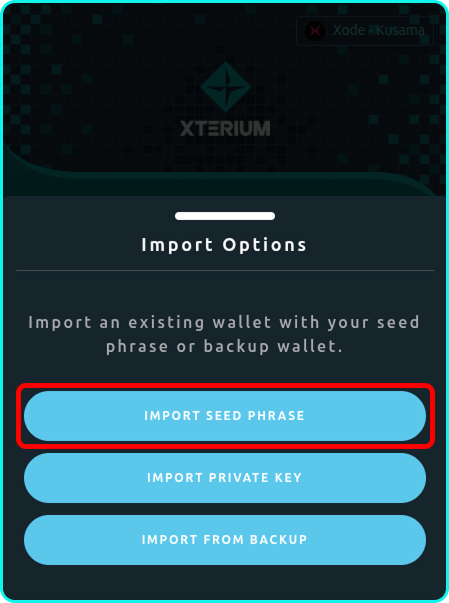
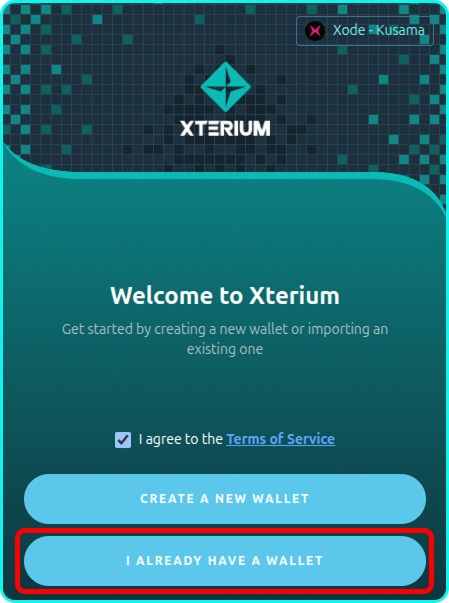
I already have a wallet
Import seed phrase
Agree to Terms of Service
Tick the checkbox to confirm that you agree to the Terms of Service of Xterium. Then, click the Create Wallet button to proceed.
Select “Import Seed Phrase”
Enter a name for your wallet. A mnemonic phrase will be automatically generated—make sure to store it securely, as it is essential for recovering your wallet. Once saved, click “OK, I saved it somewhere” to continue.
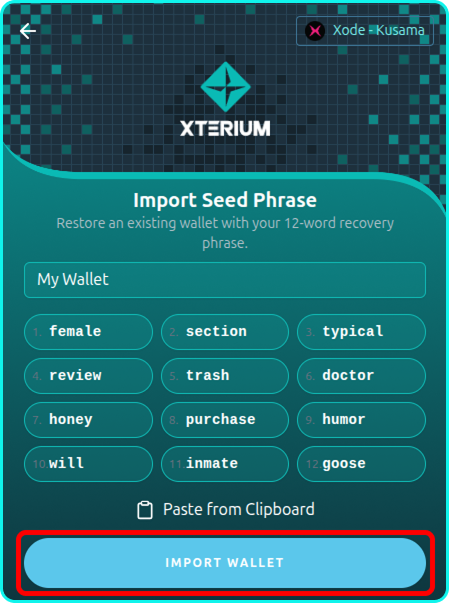
Enter Wallet Name and Paste Mnemonic
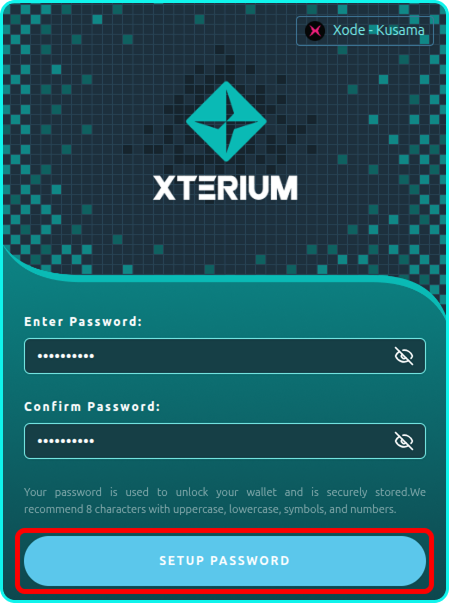
Create a strong password that will be required for logging into the extension, transferring tokens, and exporting your wallet. Click the Set Up Password button to proceed.
Input Password
Wait a moment while your wallet is securely saved and stored locally on your device.
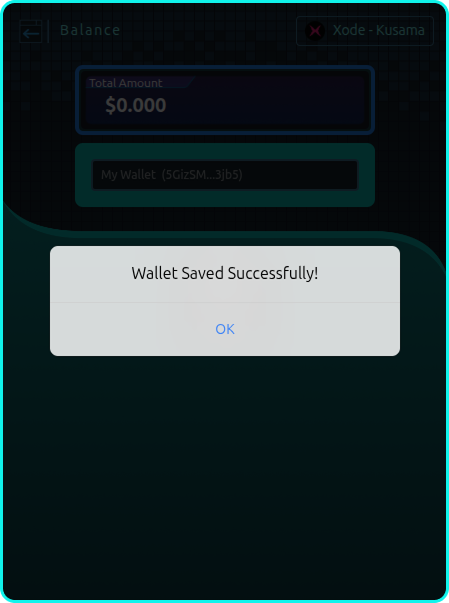
Access Your Wallet
Once completed, you can view your newly created wallet in either the Balance page or the Wallet section of the extension.tetur adipiscing elit. Ut elit tellus, luctus nec ullamcorper mattis, pulvinar dapibus leo.
Import Private key
Agree to Terms of Service
Tick the checkbox to confirm that you agree to the Terms of Service of Xterium. Then, click the I already have a Wallet button to proceed.
Select “Import private key”
Choose the Import Private Key option.
Enter Wallet Name and Paste Mnemonic
Enter or paste your private key and provide a name for your wallet. Then, click Import Wallet to continue.
Input Password
You will be prompted to enter a password. This password will be required for future transactions and wallet export. Click Setup Password once done. After confirmation, your wallet will be securely imported and added to your wallet list, ready for use.
Access Your Wallet
Once completed, you can view your newly created wallet in either the Balance page or the Wallet section of the extension.
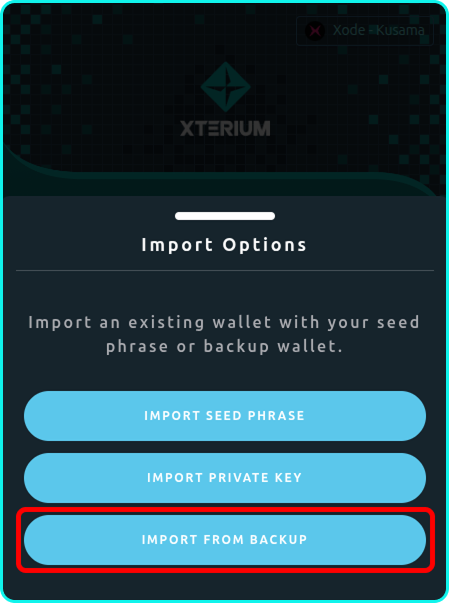
Import From Backup
Agree to Terms of Service
Tick the checkbox to confirm that you agree to the Terms of Service of Xterium. Then, click the I already have a Wallet button to proceed.
Select “Import from backup”
Choose the Import From BackUp option.
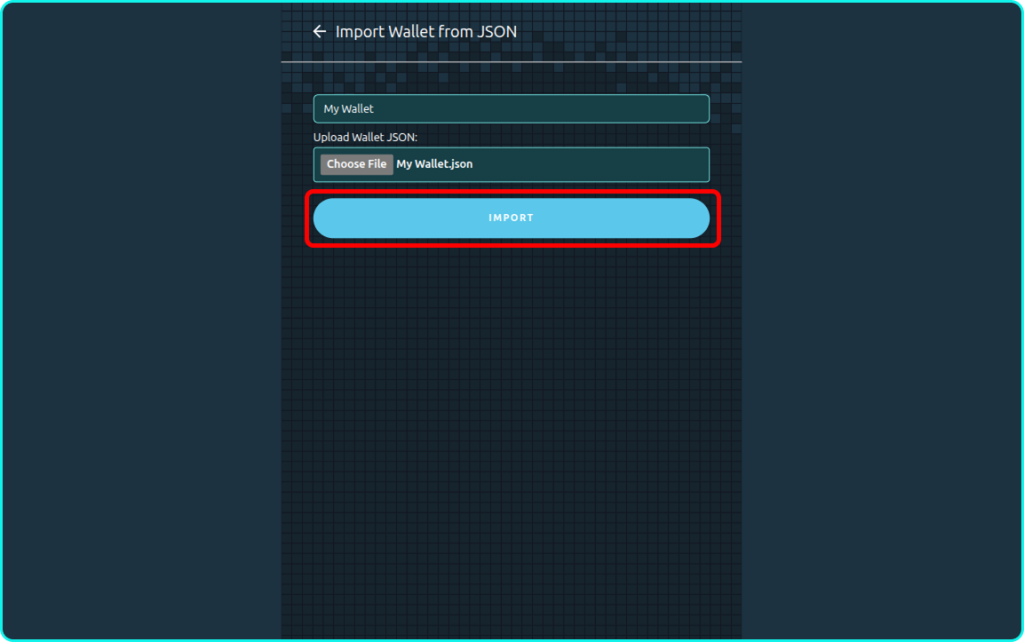
Upload Wallet Backup File
Select your wallet JSON backup file from the file explorer. After selecting the file, click Import to proceed.
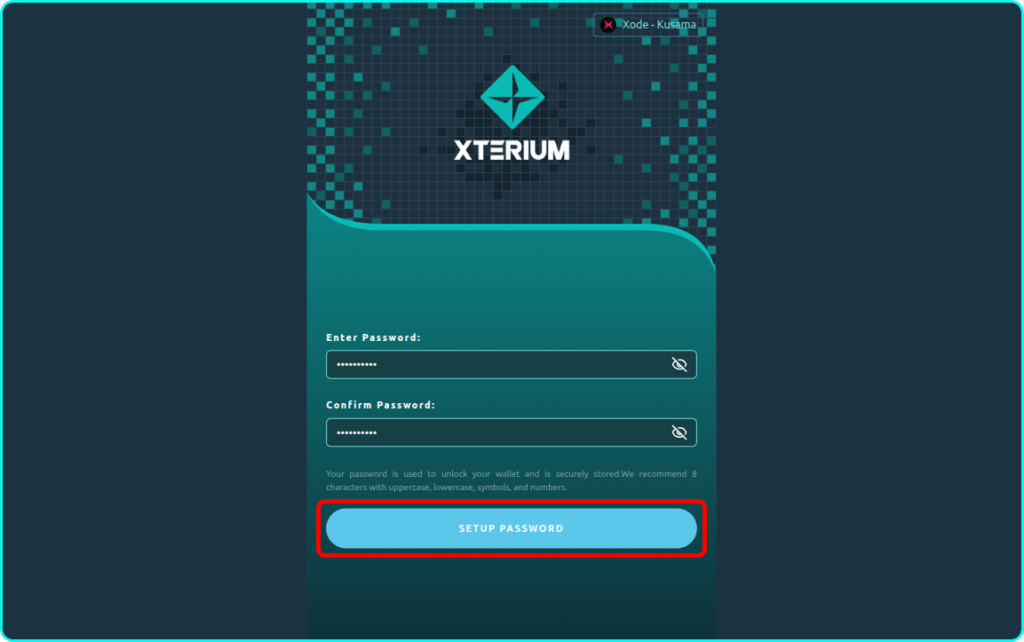
Input Password
You will be prompted to enter a password. This password will be required for future transactions and wallet export. Click SetUp Password once done. After confirmation, your wallet will be securely imported and added to your wallet list, ready for use.
Access Your Wallet
Once completed, you can view your newly created wallet in either the Balance page or the Wallet section of the extension.
Token Transfer Process
Select Transfer Details
Navigate to the Balance page. Choose the wallet address you wish to transfer from and select the token you intend to send.
Review Transferable Balance
You will be redirected to a summary page displaying your Total Balance, Transferable Amount, and Reserved Balance. If you have sufficient transferable balance, click the Transfer button to proceed. Otherwise, ensure your account has enough available funds before continuing.
Enter Transfer Information
Specify the amount of tokens you wish to transfer and enter the recipient’s wallet address. Once completed, click Send to proceed.
Confirm the Transaction
To authorize the transfer, enter your wallet password when prompted.
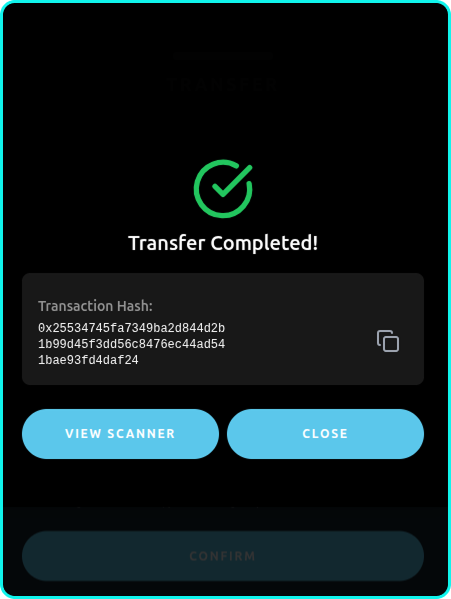
Completion and Verification
Wait for the transaction to complete. Once successful, the transaction hash will be displayed. You may view the transaction on a blockchain explorer or return to the Balance tab. Verify the transaction on both your account and the recipient’s account for confirmation.